Follow the course of the log construction as the walls and floors of Vertebrae Lodge are built. It will take over six weeks to get to the roof, which will be a massive structure.
posted by Chatter Editor @ 5:15 AM
0 comments
![]()
Follow the course of the log construction as the walls and floors of Vertebrae Lodge are built. It will take over six weeks to get to the roof, which will be a massive structure.
posted by Chatter Editor @ 5:15 AM
0 comments
![]()
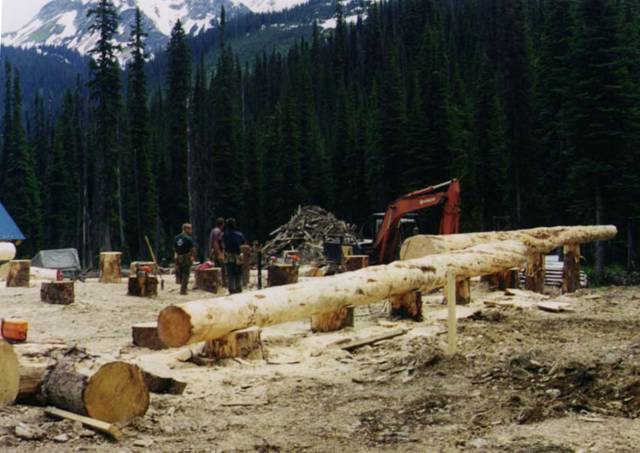
The first logs are set for Vertebrae Lodge. A milestone!
posted by Chatter Editor @ 5:12 AM
0 comments
![]()

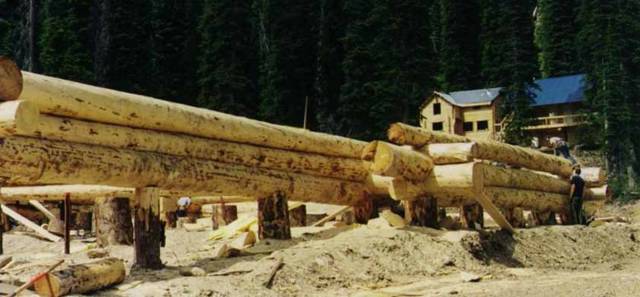
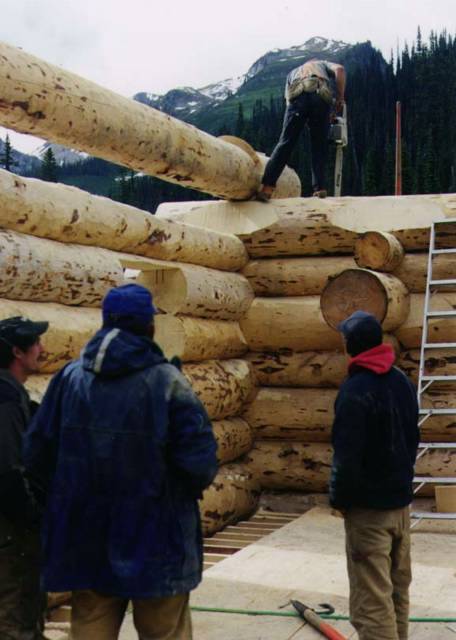
Two courses laid and Vertebrae lodge begins to take shape. Also, the workers disappear, hidden by the large logs. The effect of the taper in the logs can be seen. It will be a challenge to keep the building level as the walls rise.
posted by Chatter Editor @ 5:08 AM
0 comments
![]()
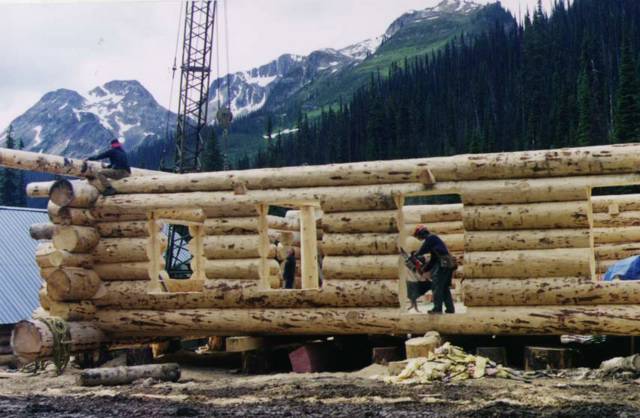
Three rounds in place. After all the preparation, these are exciting times. However, what a long way there is to go to the roof. These side walls will be 15 logs high and the end walls will have 14 logs. Two floors have to be placed as well. It will be a race against Mother Nature to get the roof on before the snow flies.
posted by Chatter Editor @ 5:03 AM
0 comments
![]()
Cutting notches for floor joists. The second floor will be more challenging with workers having to stand on a narrow beam tied to the side of the building.
posted by Chatter Editor @ 4:54 AM
0 comments
![]()

Floor joists are in and blocking has been placed to provide stiffness and to reduce twisting. The crane loads lifts of decking material in moments.
Here comes another lift of lumber form the sawmill.
posted by Chatter Editor @ 4:35 AM
0 comments
![]()

Decking being placed over the floor joists. The decking will eventually be covered with plywood. For the first few years, the floor surface in the common rooms will remain painted plywood. Bedroom floors will be carpeted.
posted by Chatter Editor @ 4:31 AM
0 comments
![]()

As the building rises, interior support is placed for upper floors. Work starts on the floors as soon as the walls are high enough for the joists to be set.
posted by Chatter Editor @ 4:29 AM
0 comments
![]()
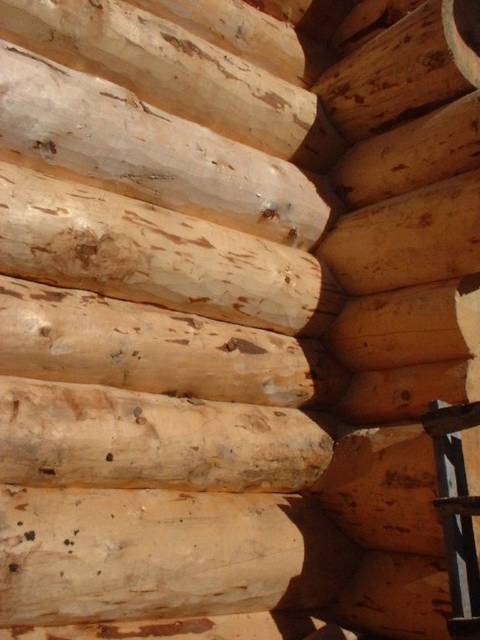
A level building is no accident. As the log walls rise, the butt ends of the logs are alternated, end of end, to offset the natural taper in the logs and to keep the tops of the walls level. Log thickness and taper varied significantly from round to round.
posted by Chatter Editor @ 4:19 AM
0 comments
![]()
First floor doors and windows appear. Window openings will be later cut to size and notched to allow the log walls to settle around the window casings. The logs are very green and are full of moisture. As they dry, there will be almost 2 ft of shrinkage in the overall height of the building. This will continue for years.
posted by Chatter Editor @ 4:11 AM
0 comments
![]()
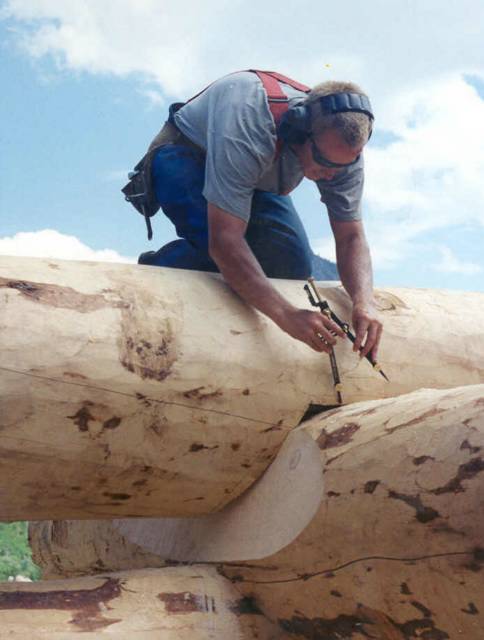
Scott scribing a joint. The log will also be scribed along it's length so the insulated groove will match the log below and give a good seal.
posted by Chatter Editor @ 3:49 AM
0 comments
![]()
In the early days, there was lots of supervision and free advice. The small bath house built the prior summer had been the learning exercise for the crew. Now they were into "production".
posted by Chatter Editor @ 3:46 AM
0 comments
![]()
After being lifted into place and scribed, this log has been broungt down and grooved and notched on the ground. Some logs are notched and grooved on the wall.
Here's a shot of Lori working a log in place (close window when done)
posted by Chatter Editor @ 3:32 AM
0 comments
![]()
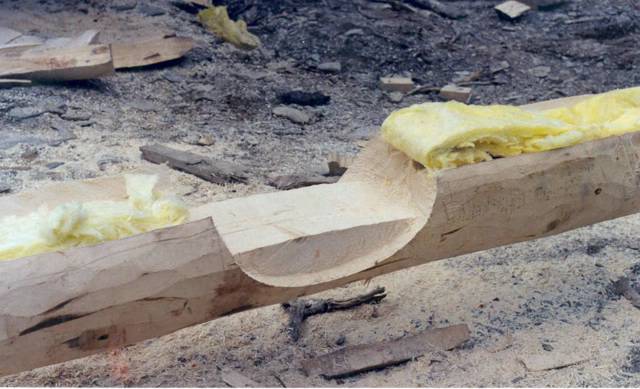
Pretty fancy notch! There must be a story here! The insulation has bee placed and the log is ready to be lifted back on the wall for final trimming and fitting.
Notice the cuts on the log from the drawknives used for peeling the logs. Over 100 logs were hand-peeled, and many of the logs were large.
posted by Chatter Editor @ 3:24 AM
0 comments
![]()

A log being finally placed, after having been notched and grooved on the ground. Insulation can be seen in the groove. The weight of the building will crush the edges of the groove so that there is a tight seal everywhere. There will be no leakage of air through these joints.
posted by Chatter Editor @ 3:19 AM
0 comments
![]()

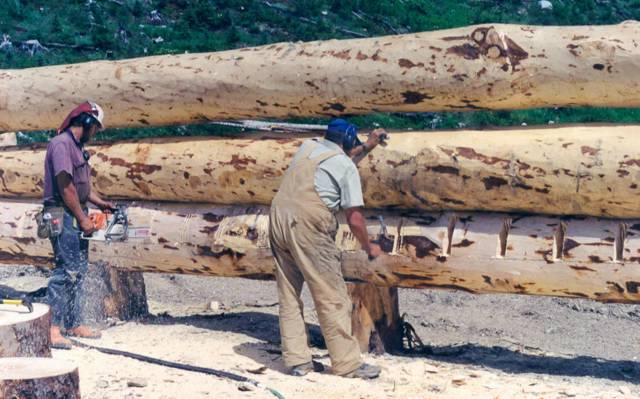
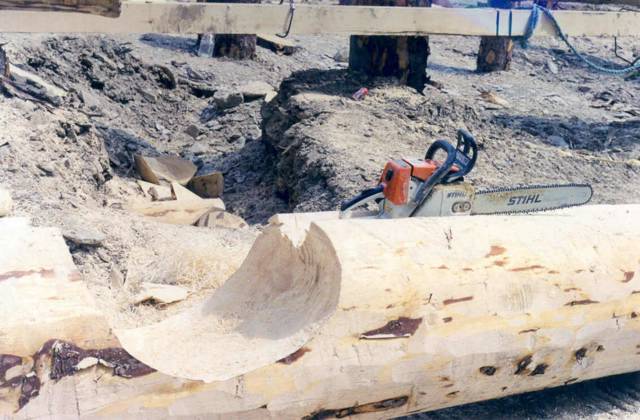
A saw shoppe is never far away from a log construction site. Chainsaws need constant attention to keep them running and sharp. This is the end wall of the (temporary) staff bunkhouse. The log peeling for Vertebrae Lode was done a little more carefully.
posted by Chatter Editor @ 3:07 AM
0 comments
![]()
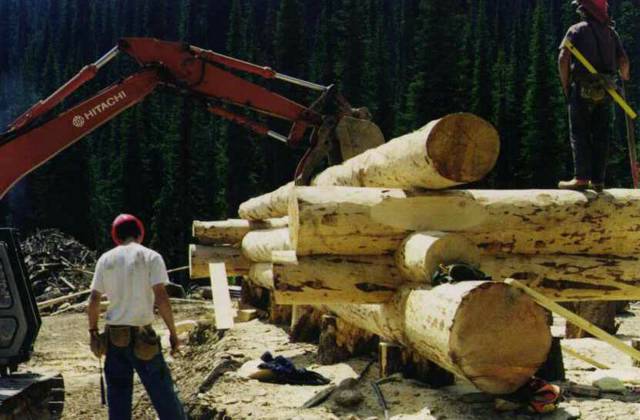
In the early days, the excavator is used to lift the lower logs.
posted by Chatter Editor @ 3:06 AM
0 comments
![]()
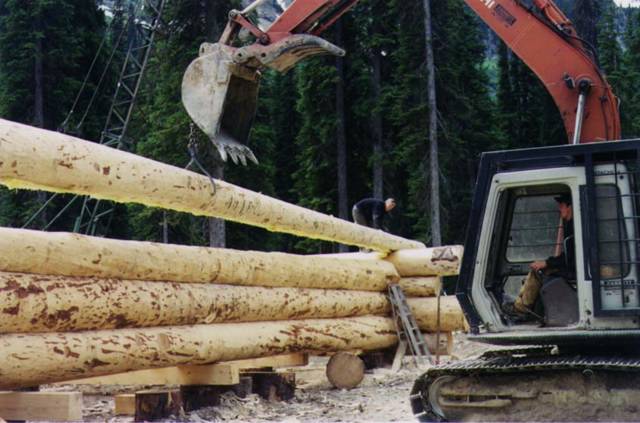
A log lift using a hook on the excavator bucket. In the early days, lots of things were tried.
posted by Chatter Editor @ 3:05 AM
0 comments
![]()

Cutting expansion keyways for window frames. As the log walls dry they shrink around the frames which must have deep slots to receive them.
posted by Chatter Editor @ 2:52 AM
0 comments
![]()
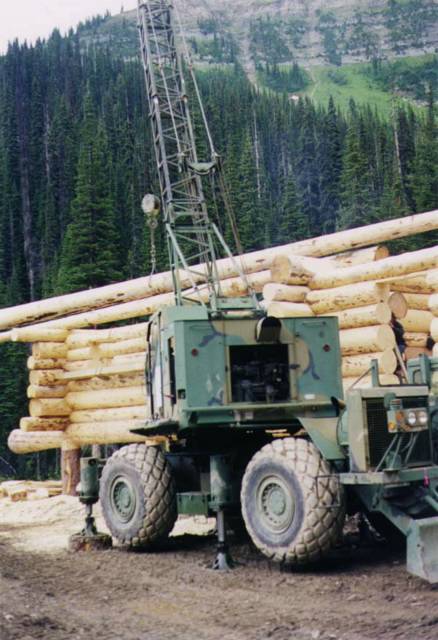
Some photos from the Solitude Lodge construction shows the crane being used to lift logs so workers on the walls can trim notches.
posted by Chatter Editor @ 2:51 AM
0 comments
![]()

As the walls arise, log walking is part of the job.
The beam hung on the side of the wall provides a walkway for a worker scribing the logs as they are placed.
posted by Chatter Editor @ 2:42 AM
0 comments
![]()

Just 6 more "rounds" to go. All the walls rise at the same rate. There are seven walls in the round. Hence, about 42 logs to be set to finish the walls. Almost done!
posted by Chatter Editor @ 2:38 AM
0 comments
![]()

The log work is finally done and posts for the roof support start to appear. The log ends will be trimmed with the final finishing of the building. Many of the windows are yet to be cut to size. That will wait until the roof is on. It's a race against the weather. The first snow is not long off.
posted by Chatter Editor @ 10:14 PM
0 comments
![]()

Skirting surrounds the crawl space, with metal flashing carefully placed over it. It's a challenge to keep animals and vermin out.
Back: Next:
Mountain Lodge Construction Vertebrae Lodge Roof Construction
posted by Chatter Editor @ 10:08 PM
0 comments
![]()
Powder hound, past Chatter Creek client, Group Organizer and creator of the Chatter News. Currently the editor of the www.heliplanet.com directory of Heliskiing and Cat Skiing.
The Chatter News links to a collection of photo galleries that relate just about everything there is to tell about snowcat skiing at Chatter Creek, near Golden BC.

Visitors: .